Friday, September 25, 2015

All About Apples

September is the start of apple picking season in New England.  Apple picking is a great way to spend your afternoon with families and kids.  They can see where the apples grow and look at all of the different kinds.

It’s not only fun to pick the apples, but they are good for you too!  Apples are a great, low calorie fruit with no saturated fat or cholesterol. They are also filled with great vitamins such as vitamin C and B-complex vitamins and minerals like calcium, potassium, and phosphorus which make you healthy and strong.  It’s no wonder why they say an apple a day keeps the doctors away! 

There are many different types of apples that grow in the New England area that are great for apples, sauces and other snacks. 
C.N. Smith Farm in East Bridgewater has a great list of apple varieties, harvest dates and uses.  You can check it out here.


Here are some yummy treats you can make with apples:

 
Apple Cider
Nothing says fall like enjoying a nice cup of apple cider.  This cozy beverage can either be served hot or cold.  Many apple orchards and stores sell apple cider, but if you are looking for a nice drink to make with your kids and want your house to smell delicious, you can make it at home. For a recipe, click here!
Apple Pie
After a nice big dinner, apple pie is the best dessert to serve in the fall and a great way to use all of the apples you picked!  Your kids can help you mix the ingredients together as a great introduction to cooking in the kitchen.
Suggestion- Serve hot with vanilla ice cream and whipped cream! For a recipe, click here!

Apple Sauce
A delicious snack or even a healthy baking substitute for oil, this apple sauce is supper easy and everyone will love it!  All you need is some apples, cinnamon, a Crockpot and mason jars to store. For a recipe, click here!


Caramel Apples
This fall treat is often seen at fairs and carnivals, but you can also make it at home.  With this mini caramel apples recipe, you can serve them at fall parties or gatherings and kids will be coming back for more. For a recipe, click here!


Apple Chips
This crispy and crunchy snack is super easy to make and a healthier alternative to potato chips. Just thinly slice your apples, pour on some cinnamon and bake them in the oven for about two hours.  These are great to put in your kids lunchbox or an after-school snack. These chips are so good that you might want to make a batch for yourself too! For a recipe, click here!


Apples and Peanut ButterIf you aren’t in the mood for baking, kids will love their apples with peanut butter.  You can even make these cute little sandwiches and add in some granola or raisins.


Here are some great orchards to visit in the Southeastern Mass area to visit with your family this fall:
  • ·         C.N Smith Farm Inc- East Bridgewater, MA
  • ·         Fairmount Fruit Farm- Franklin, MA
  • ·         Downse Orchard- Sherborn, MA
  • ·         Wijcik Farm- Blackstone, MA
  • ·         Belkin Family Lookout Farm-Natick, MA

Written by Stephanie Starbard- PR and Communications Intern


Wednesday, August 19, 2015

Blue Hills Brewery

Submission by Susan Finn
- Long-time supporter of The Childrens Museum in Easton
- Social media enthusiast at SusanFinnOnline.com

The folks over at Blue Hills Brewery, located just up the street a bit on Route
138 in Canton, claim that beer is their life! Since 2009, they have been creating great tasting beers which they say are inspired by the elements and nature around, embracing the rich history of the Blue Hills and the South Shore. 

Recently, I had an opportunity to chat with Jim O’Neil, the Director of Operations for Blue Hills Brewery. I asked Jim what that position means at Blue Hills Brewery. He told me that he is involved in just about every aspect of the business other than the hands-on brewing process. That means he oversees financials, HR, social media, interns, sales team, donations, and event planning. It’s safe to say that Jim knows just about everything there is to know about Blue Hills Brewery.

Jim started our conversation by pointing out how much he absolutely loves his job. The atmosphere at the brewery truly is fun (just like everyone thinks it is!) There is always something interesting going on, and everyone has a great attitude. And each day is different. A couple of days a week they are brewing.  Another couple of days a week the bottling or kegging takes place. Another day is for cleaning.

I learned that the Blue Hills brew house has the capacity to brew 20 barrels at a time! That's about 620 gallons per batch. The beer spends the first 7-9 days in a primary fermenting vessel. After that time, it will be transferred to a secondary fermenter where it gets chilled to about 40 degrees. It is kept there for another 7-10 days. Finally, it is ready to be filtered, carbonated and kegged. All of the Blue Hills beer is brewed on site.

There are some great internship opportunities here. In July of 2012, The Boston Globe published an article about the popularity of a Blue Hills Brewery internship. There have been 60 interns at this location since 2011. 12 of these have gone on to work in the industry. Jim tells us that the prerequisite for being an intern here is experience and a passion for home brewing.

Jim told me that their most popular beer is the Blue Hill IPA (which comes in bottles, kegs, & cans.)  It does seem that the IPA is the most popular style in USA. It seems to be the one most people know about it.

The Blue Hills Brewery I.P.A. recipe is formulated true to its style:

“It has a fiery amber color and weighs in at 6.6% ABV. We use a blend of American hops to give it a citrus, almost tangerine aroma from the top of the glass. As you drink the beer you can taste the sweet creamy caramel malt roll over your tongue. At the end once again taste the big hop flavor that is a trademark of all I.P.A.'s, but yet, so smooth that it won't make you pucker at the bitterness.”

What's the next beer we should be looking out for? He answered that the fall
release is the Imperial Oktoberfest. This is a traditional German-style Marzenbier. It’s a refreshing beer, brewed with a nice balance of malt and hops. This style is a limited release.

My favorite question to ask beer enthusiasts is what beer and food pairing they would recommend. Jim had an answer ready. One of his favorites is to have a nice stout with a plateful of cold oysters. He told me it’s the Yin/Yang effect. The hearty stout balances out the subtle, slightly briny flavor of the oysters. I, for one, am going to try this, for sure!

Blue Hills Brewery proudly states “Variety is the spice of life. We strive to offer seasonal beers that reflect the diversity of our world and beer culture.”

Click here for Blue Hills Brewery's current beer offerings. You are invited to their public beer tastings held every Friday from 3-7pm and on Saturdays from 1-7pm.

We are honored to have Blue Hills Brewery representing their craft beer this Saturday, August 22nd at A Night At The Brewseum.


Tickets are still available for the 2nd Annual Night At The Brewseum.
Click here for event details and to purchase tickets.


Monday, August 17, 2015

Where in the World?

To build off of our geography day, Where in the World?, we want to emphasize the importance of exposing your kids to other cultures. During this summer drop-in day at The Children’s Museum in Easton, we were able to explore many aspects of the world’s geography and cultures. Various activities helped educate kids about our planet’s water supply and soil erosion, giving them an important outlook on our planet. Visitors to the Museum made flags from different countries, and we had additional arts and crafts that allowed kids to become more aware of where they are in the world. Also, there was a fun game of geography twister that was a huge hit!

With the passports you have created at the Children’s Museum, you can continue to add and mark places you and your kids have explored. It is easy to learn about various cultures without having to actually travel. Cooking and tasting foods from other countries is an excellent place to start at home! It can become a weekly tradition with your kids as you mark the different countries of which you’ve explored in the kitchen. Laying out a map and marking the countries or stamping in their passports will be a reminder of each unique experience. 

Geography Twister
It is simple to investigate authentic cuisines from around the world; doing so by setting the scene at home for your kids to really imagine what it's like in other countries can be a great eye-opening experience. You can get started by searching online about various cultures and their recipes or visiting your local library. Trying a different cultural restaurant or visiting the international isle in any grocery store is also a simple way to investigate various countries’ foods with your kids. Try some of these food recipes from around the world!

Not able to attend our day of exploring the world at the Museum? You can easily make your own passport at home by using an old notebook or simply stapling a few sheets of paper together. In addition, try some of the following educational at-home activities!


Helping your kids become more aware of where they are in the world is so important. Explaining the different times zones, exploring how different cultures dress (traditional clothing print out), and even learning a few words (50 ways to say hello) in other languages are excellent places to start at home. Doing so, can help your children become more aware of just how big the world around them really is. Visiting your local library is a fantastic place to begin exploring other cultures with your kids as well.


Thursday, August 13, 2015

Date Night

By Carla Ramsey

Life can get mundane and flat at times. My husband and I are always on the lookout for something new and flavorful, where we can kiss the kids goodnight and head out for some adult time with each other and friends. Living in
Easton has many great qualities but, no matter where you live … sometimes you want to do something new and different

Having two kids under the age of 8, I became quite the frequent patron to The Children’s Museum in Easton. Now you may say, “Where is this going;” children museum and adult time do not sound like a story that can be brewed together…

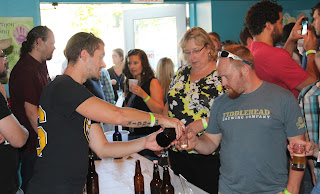
Last year, The Children’s Museum in Easton held a fundraising event to support the exhibits and education programs of the museum, A Night At The Brewseum. It was a night where adults could mingle, taste local beers and partake in a new and exciting outing. It was a celebration for each of us to have the time we needed in an atmosphere we were looking for. We invited a close couple of friends and walked down to the center of North Easton.

Upon arriving, we were immediately impressed with the organization and
efforts the staff and volunteers had put into this event. Outside in The Wild Place, their outdoor learning center was transformed into a Beer Garden. Breweries were set up under tents, allowing us tasters to mingle and sample. There were 14 craft beer producers from the North Shore to Western Massachusetts and a few that stretched outward to Maine and other New England points. We each found our favorites and found ourselves mapping out a plan of action to taste several again and make our way onto the other breweries while enjoying the live entertainment. The scene was really “hoppy”!

After trying every 3 oz sample our palate desired in a classy (real glass!)
2015 Tasting Glass
souvenir tasting glass, we decided to venture inside to see what else was being offered. There was more live entertainment and my husband and his friend, Dave, found a great place to hang out … the local amateur brew competition was right downstairs, and they had a feeling that their opinion needed to be heard. They, as did I and Dave’s wife Sarah, sampled what our “neighbors” were offering from their basement brew experiments. Let me tell you, these competitors took this event with all seriousness and we were all quite impressed. Some of them deserved to be outside with the big boys!


Home Brewing Competition Inside
Now that we were feeling effervescent, we took our bellies over to the catered food section and enjoyed some complimentary nourishment from Buffalo Wild Wings plus a lot more food available to be purchased outside. With great conversation, meeting friends of old and making friends of new, everything was what my husband and I were looking for.


And now, all four of us will be returning to this year’s A Night At The Brewseum on August 22nd. We are popping with curiosity to see what the amateurs will be brewing up, as well as what other great regional breweries will have to offer this year! Kudos’ to The Children’s Museum in Easton and their staff and volunteers for not just hosting the beer tasting but for catering to our thirst for more!


Hope to see you at the event!


Tickets are still available for the 2nd Annual Night At The Brewseum.
Click here for event details.


Friday, July 31, 2015

The Science of Brewing

A special submission by Chris Gemmiti, PhD
- Board Member, The Children’s Museum in Easton
- Long-time home brewer
- Bio-Scientist, Wyss Institute for Biologically Inspired Engineering

For those of you who love a fine beer, you’ve likely wondered what magic happens to make that tasty brew so darn good. If so, you’re in luck: in this blog post, I will give you the highlights of the science behind brewing. By the end, hopefully you’ll be convinced that brewing beer is really quite simple–not magic at all–You may even find yourself inspired to give home brewing a try for yourself.

Introduction to the Science of Brewing:

Reinheitsgebot

Reinheitsgebot (or “purity order”) is otherwise known as the “German Beer Purity Law,” and serves as the foundation for the original three ingredients of beer:
  • Water
  • Barley
  • Hops

This 1487 law restricted the making of beer to only those ingredients. It
wasn’t until the 19th century that the role of yeast was discovered in fermentation. It was then that it was acknowledged that yeast was central to brewing (previously, wild yeast made its way naturally into the unsuspecting brewer’s batches). The current German Beer Law includes yeast, along with its predecessors of water, barley and hops, as the key ingredients.

You can read more about the history of Reinheitsgebot on the German Beer Institute's Portal for North America.

Barley:

Barley a member of the grass family is a grain that has wide use in foods, from cereal to soup to bread, and has a great many flavors known as cultivars (read more about barley). For those of us interested in beer (and whiskey), barley is the key source of sugar. That sugar adds not only color and taste to your beer, but is a substrate for fermentation. Prior to making its way into that bottle of beer however, barley must undergo the malting process. Barley, in its raw state, does not contain sugar, but starch. In the malting process, an enzyme (contained in the barley kernel) converts that starch to a sugar. To activate that enzyme, the barley is hydrated with water, warmed to induce germination, and is then dried into malt (or malted barley). One then roasts the malt, akin to toasting, to bring out different flavors and colors very similar to coffee beans. You can see a nice depiction of those malted barley types in "Debunking the Myths Surrounding Dark Beer" by Ashley Rouston and in this online Home Brew Manual, that latter of which has a nice explanation of how those colors are measured using the Standard Reference Method (SRM). If youre interested in home brewing, dont worry: youll have purchased your malted barley completely ready to be used.

Hops

While barley adds the color and sweetness (or lack thereof) to beer,
hops add the bitterness and much of the aroma. If youve ever had a strong India Pale Ale (IPA), you know what a beer full of hop character is all about. That character is due to the alpha and beta acids contained in the lupulin glands of the hop cone. The hop cone looks like a lime green acorn with the consistency of a flower. If you peel open a hop, you expose the glands containing those wonderful oils and resins. Hops are planted as rhizomes (looks like ginger root) and grow as tall vines which produce a great many hop cones. You can even plant your own hops and train them to grow up a lattice or pole; easy to order! You can assess how hoppy your beer is by looking on the bottle or package for the IBU, or International Bittering Units; the higher the number, the hoppier the beer. 

Yeast

Yeast is the microorganism responsible for that conversion of sugar (from the malted barley) to carbon dioxide and alcohol, otherwise known as fermentation. While yeast is the undisputed workhorse of brewing, the two main types of yeast yield the two main types of beer: ales and lagers.

  • Ales come from ale yeast (a “top fermenting” yeast), which start fermentations at relatively higher temperatures (10-25C). 
  • Lagers come from lager yeast (“bottom fermenting”) and undergo a “lagering” process at lower temperatures (7-15C).
The top and bottom descriptor refers to where the yeasty foam layer accumulates during the brewing process. For you science lovers, here is a nice article from Popular Science.

With those three (four, including water) main ingredients covered, let’s step briefly through the (home) brewing process. Note that this is NOT meant to be an instruction set to home-brew, but instead a high-level overview of the process. 

Before actually firing up the stove (or LP tank burner), you’ll need to get your supplies. Home brewing supplies will include both hardware and raw materials. Most folks start off with a 5-gallon batch, which yields 2-3 cases of beer. Pre-made kits (both hardware and materials) are readily available from your local homebrew store, such as Homebrew Emporium, or internet retailers such as Midwest. The starter hardware should set you back $80-100 for a basic outfit, the raw materials about $40-50. If you’re just starting out, I recommend you ‘buy local’ to have one of the excellent staff members help you through the process. Lastly, you’ll also need a proper how-to book to have as a guide and reference. While there are plenty of sources on the internet, a book will stand up to the mess home brewing can create better than your laptop. You can also make handwritten notes in it as you progress in your experience. 

Step 1: Brew
Once you have everything, the process itself it really quite easy so long as you do two things: (1) don’t contaminate anything (no sneezing into your fermenter!) and (2) relax, have a beer. The first step centers on steeping your malted barley in hot water (typically 2-3G in a large pot) to extract all those wonderful flavors and colors. If you’ve made tea before, this is the exact same process (just in a much larger batch!). After a set time, you’ll bring your wort (pronounced “wert”) to a boil and start to add your hops. Hops left in for a long (20-30 minutes) impart a bittering flavor to the beer. Hops boiled for a short (5-15 min) impart the aroma. After that roughly hour or so of boiling, it is time to cool down your “green” beer to a temperature that your yeast will like (depending on what yeast type you’re using). Once it is ready, you’ll combine that wort with yeast, and you’ll tuck your beer away in a dark place (remember: light skunks beer) and let the yeast do their thing. Good news; the (ahem) hard part is over, in just about a half day’s time.

Step 2: Ferment
This is the easiest part of the process; because all you have to do is check in on your fermenter to make sure everything is going to plan. That includes keeping an eye on the temperature (to make sure the yeast remain active), ensuring your fermenter isn’t getting too much light (none at all is ideal), and making sure you haven’t made a mess. Your yeast should be bubbling away and “burping” carbon dioxide (CO2). Your beer will take at least 2 weeks to ferment, but most home brewers leave it be for 4-6 weeks to allow for the most complete fermentation.

Step 3: Bottle (or Keg)
As the penultimate step, you’ll be ready to bottle (or keg) your beer. Hopefully you’ve been saving (and rinsing!) about 2-3 cases worth of 12oz bottles to store your beer; obviously you can also buy them new. Assuming you’re bottling, you’ll add some priming sugar to each to allow for carbonation to naturally build up during the bottling phase. If you’re kegging, you’ll skip the priming sugar as you’ll be force-carbonating using your CO2 tank. Either way, you’ll want to allow for anywhere between 2-6 weeks to get the right carbonation set up. Of course, periodic sampling is encouraged to track the progress.

Step 4: Drink!  (And repeat)
After our roughly two month journey, viola, we have beer! Now comes the part we’ve all been waiting for: drink your beer! Most home brewers are surprised and thrilled at the accomplishment of making pretty darn good tasting beer on their first try. We hope you do the same; so much so that you try another batch!

In conclusion, brewing beer is as easy as it is fun. As with most things, you can make it as difficult and expensive as you want, but happily, you can get going with a fairly modest investment of time and money. As you grow as a brewer, you’ll try new tricks and beers, and show off to your friends what a wonderful home brewer you’ve become!

Cheers!

This article kicks off our blog for our 2nd annual Night At The Brewseum, a craft beer expo featuring tastings from local craft beers & ciders. The event scheduled for August 22, 2015 also features a home brewing competition, food, music, and a science of brewing exhibit. Tickets are on sale now! Click here for details and tickets.


Image sources:
         Barley: https://en.wikipedia.org/wiki/Barley


Monday, July 27, 2015

Free Fun Friday 2015


The Children’s Museum in Easton is pleased share our success from participating in the Highland Street Foundation’s Free Fun Friday for the fifth consecutive summer. As you may know, Free Fun Friday is a wonderful program that offers visitors a no cost admission to many of the most treasured cultural institutions in Massachusetts.Since 2009, “Free Fun Friday” has drawn more than half a million visitors to venues throughout the Commonwealth. In 2014 alone, the program reached 150,000 people. This year, we are proud to be among the 70 participating institutions. The Museum hosted about 1,600 people for a day filled with arts and crafts, along with fun outdoor activities. For a complete schedule of Free Fun Friday click here.


Kids show off Free Fun Friday
sunglasses outside in the Wild Place

Inside the MakerSpace
Guests were able to explore our three floors of interactive and educational activities. Our new MakerSpace was a huge hit! Every room of our Old Fire Station was filled with children playing and learning. In addition to exploring indoor exhibits, visitors were also excited to discover our outdoor Wild Place on the beautiful sunny Friday afternoon. Along with arts and crafts and other fun outdoor activities, we had a raffle set up for kids to win a stuffed-Dalmatian.
Be sure to click here to check out what else the Children's Museum in Easton has to offer! 


We were pleased to have the U.Fund Dreams Tour join us again this year on our Free Fun Friday day at the Children’s Museum in Easton. The goal of the U.Fund Dreams Tour is for parents to invest in a secure savings account for their child’s future. U.Fund explains all of the components of the savings plans through the interactive “activity pavilion.” To learn more about the specifics of the U.Fund savings plans click here.


U.Fund Activity Pavillion


The “activity pavilion” on the U.Fund Dreams Tour was a key attraction on the Museum’s Free Fun Friday day. The pavilion engages both kids and parents, encouraging adults to plan for the child’s future education. The children are able to choose a profession they want to be when they grow up, and then pose for animated photos. While kids are playing games that teach them to “aim for the moon” and posing for pictures, parents are able to gauge where they are financially with regards to saving for their child’s future. The U.Fund Dreams Tour introduces families to savings programs and plans in a fun interactive environment. Overall, Free Fun Friday at the Children’s Museum in Easton was a huge success. 


Friday, June 26, 2015

Get Up and Play!

This summer is a great time for you and your child to try something different. There are plenty of toys like yo-yos and hula hoops that can be mastered and taken to a new level. Your child will be amazed at how fun these toys are!

Benefits of Play
Time spent away from the TV/computer can have long-lasting benefits for the development of your child. When children play, they are improving their cognitive, physical, social, and emotional well-being which keeps them happy and healthy. Play also allows parents to connect more fully with their children, and gives them an opportunity to spend more time together.

Despite these benefits, however, play time is often sacrificed and replaced with screen time in front of the TV or computer. However, these ideas will be sure to get you and your child off the couch this summer to learn a new skill and have some fun together!


Yo-Yoing
Think yo-yos are only for walking the dog? Think again! Since the 1950’s, yo-yos have been evolving at an extreme rate. With the introduction of ball bearings, aluminum bodies, and polyester string, yo-yoing has transformed into a sport that is enjoyed all around the world!


Benefits of Yo-Yoing
Just like play, yo-yoing has a number of benefits that help your child’s development. Some of these include:


  1. Develops fine motor skills
  2. Improves hand-eye coordination
  3. Increases creativity
  4. Develops acute spatial awareness

Yo-yoing also benefits children with learning disabilities like ADHD by increasing their self-esteem and self-confidence as they learn new yo-yo tricks. 

Back to Basics
Just like anything else, you have to master the basics before going pro! Check out these tutorials for the essential yo-yo tricks that every yo-yoer needs to know!

photo credits:
Jennifer Williams/The Ithacan
If you’re looking for more yo-yo fun, come by the Children’s Museum on Monday, July 20 for a yo-yo demonstration and lessons by Donald Hodgkinson

Click here for more info


Hula Hooping
Hula Hooping is another great toy to master this summer! Just like yo-yos, Hula Hoops became popularized in the 1950’s. As the fad grew, more than 100 million plastic hoops were sold across the country over the course of two years! Since then, ‘hoopers’ have taken this simple toy to crazy new levels as it’s grown into its own competitive sport.


Benefits of Hula Hooping


  1. Gets kids moving and exercising without them realizing it
  2. Improves fine and gross motor skills
  3. Helps improve confidence
  4. Increases body awareness and spatial skills

Ready to start? Watch Lolli Hoops of the Boston Hoop Troop demonstrate some of the basics


If you’re looking for more hooping excitement, check out the Children’s Museum on Thursday, July 30 for a hula hoop demo by the Boston Hoop Troop! Click here for more info


Wednesday, May 6, 2015

Celebrating Robots


To wrap up mini-maker week at The Children’s Museum in Easton, innovator and designer Steve Norris was our special guest maker who helped us celebrate robots! 


 Steve brought three robots for the kids to interact with; Huey, Frank, and Butler-Bot.

Huey: Color chasing robot
Butler-Bot: robot made from a trashcan

Frank: Face-detecting robot


  • Huey is a color chasing robot, which is attracted to the color orange.  Kids got to hold up an orange piece of paper as Huey followed them wherever they went. 
  • Frank is a face detecting robot, who recognizes the kid’s faces as they stand in front of it.  
  • Lastly, Butler-Bot is the robot made from a trashcan who was roaming the floor for almost two hours straight.  Butler-Bot was also featured in the latest Transformers Movie!  Steve spent a week on the set and had an amazing experience, he said that he never thought his hobby would take him this far.            

Steve Norris is a software programmer and a writer for Robot Magazine.  Writing for the magazine is Steve’s favorite hobby, where he gets to write every two months about the robots he builds.  He has built 44 in total, one every two months, and has written in the magazine for just about all of them. 


Scribble-Bots
Kids making their scribble-bots
The children also got the opportunity to make their own scribble-bots!  These scribble-bots were made out of simple household items including the motor from the inside of an electrical toothbrush. For instrucions on how to make your own, click here to visit the Exploritorium website!  The kids got to watch their robots come to life as they made cool designs scribbling all over the paper.  Steve loves to inspire people into getting involved in science and technology, so watching the kids in awe as they designed their own robots was a great experience for us and him.  To check out more amazing creations from Mini Maker week, look for our blog post about textle artist Rhona Fazio!